 "Bozi Tatarevic" (hoonable)
12/17/2013 at 10:12 • Filed to: None
 8
8
 14
14|
"Bozi Tatarevic" (hoonable)
12/17/2013 at 10:12 • Filed to: None | 8
| 14 |
The next article in my car part series is going to concern buying parts to upgrade and maintain your vehicle. I will also include information on how to get parts for projects on the cheap. This is a follow up to my original article !!!error: Indecipherable SUB-paragraph formatting!!!
!!! UNKNOWN CONTENT TYPE !!!
Maintenance and Repair
So you have a nice daily driver that's fun to drive or you have nice project car and you need to do maintenance on it. There are many paths to approach this and you can replace with OEM or OEM-equivalent parts or you can do some upgrades in the process.
There are many parts that can be upgraded in the process of maintaining your vehicles. Brakes, suspension and drivetrain are great places to upgrade if they need maintenance anyway.
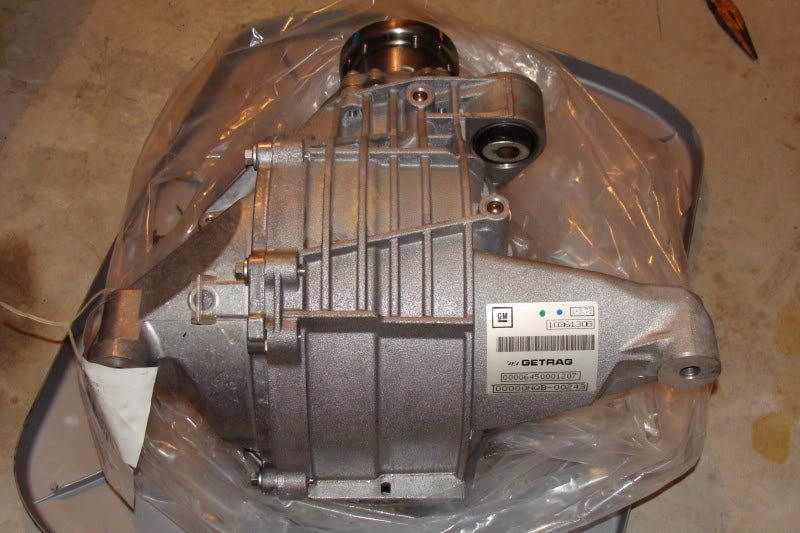
Once again, I am going to user my 05 Cadillac STS as an example of items that can be upgraded in the process of doing maintenance and repairs. When I bought the car, it was making some noise from the rear differential so I investigated and found that the differential had play internally and the front bushing was basically destroyed so I set off to replace the parts.
1. Check the part model interchange to see what other models may use the same or similar parts. In my case I found that the STS-V, CTS-V, CTS, SRX, and Solstice use the same or similar differential.
2. Check OEM parts. I checked the differential online and found that a new unit would be about $900 and a new OEM bushing would be $21
3. Check OEM upgrade parts. I found that the CTS differential would be an upgrade as it had the same ratio but was Limited Slip compared to my OEM differential. New cost was $1200. I also found that the STS-V bushing was slightly stiffer and held up better and was $30
4. Check aftermarket parts. I found that there were aftermarket LSD options in the $900-1200 range but it would also require about $200 in other OEM parts to rebuild. There were a few aftermarket bushings in the $50-70 range but were too stiff for my daily driver application
5. Check junk yards. I found the LSD CTS differential going for $200-300 in local junkyards with good mileage
6. Check eBay. I found the LSD CTS differential on eBay for about $160 shipped with good mileage
In this case, I opted to get the LSD CTS differential on eBay as it was most cost effective and offered an upgrade at low cost. I matched that with the STS-V bushing and new axle seals before I put it in. Total cost for the repair/upgrade was about $220. My driveline noise was gone and I upgraded to an LSD in the process
Project Car Upgrades
There are many ways to approach project car upgrades. You can always buy parts from aftermarket companies that have been made for the vehicle that you are working on but there are also ways to build and match items yourself.
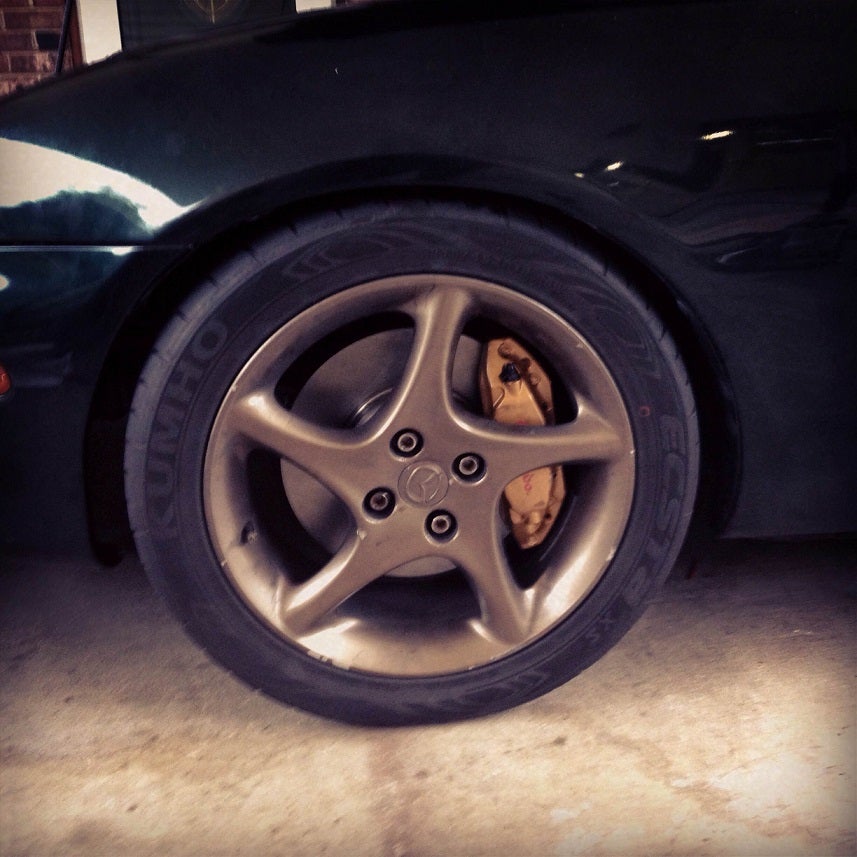
In this example we are going to use the V8 Miata that my buddy and I built. It has a 5.3L LS motor backed by a T56 manual transmission and makes about 3 times the power it did as stock so we needed to upgrade the brakes. There are aftermarket options but they are either not matched to our goal or way out of price range so we set out to build our own.
1. Measure the factory parts. In this case we measured the size and thickness of the rotor. Hub Size and lug pattern. The size of the caliper, size of the pistons inside the caliper, the size of the brake master cylinder and pad area. We recorded these measurements and made calculations for clamping force and pressure.
2. Search for similar vehicles. We found various brake rotors the matched the lug pattern of the Miata that offered a larger rotor. We settled on the Mini JCW rotors as they were about 1 inch larger but had the same hat offset. We found the rotors on Amazon for about $70 for the set. Next up was the brake calipers, we looked at various options that were 2 piston and 4 piston. We made calculation for each one and settled on Nissan Sentra Spec V Brembo 4 piston calipers as they were within 2% of the Miata clamping force so they would not change brake bias but offered larger pad area and better cooling. The calipers were found on eBay for $250 for the set.
3. Find supporting parts. The brake lines were measured and stainless versions made locally at a hydraulic shop for $60. Performance brake pads were purchased on Amazon for $60
4. Put it all together. We removed the spindle from the vehicle and installed the rotor and mocked up the caliper. We found the caliper offset matched well but the mounting bolt holes were slightly off so we had one of the holes welded up and drilled and tapped a new hole to match the Miata mounting. We installed the whole setup and filled and bled the brake fluid
5. Test it out. We tested the brakes in the area behind the shop at first to make sure it was working properly. We found a little mushiness and bled them again. The next test showed the pedal feel was again at proper level and the project was done.
6. Sell the factory parts. This Miata had the factory sport brake option so the old brakes were sold on the Miata forums for $80
The total project investment was around $490 minus selling the old set, we ended up at a total cost of $410. This price is cheaper than most of the brake upgrade kits available commercially and increases brake performance but has the added benefit of using OEM parts that are fully serviceable.
There are many ways to approach upgrades and using non-conventional methods and some research you can come up with great upgrade for a low cost.
Check out my other upgrade and swap articles:
!!! UNKNOWN CONTENT TYPE !!!
!!! UNKNOWN CONTENT TYPE !!!
!!! UNKNOWN CONTENT TYPE !!!
 Party-vi
> Bozi Tatarevic
Party-vi
> Bozi Tatarevic
12/17/2013 at 10:26 |
|
Excellent post. For my car I ended up with an aftermarket disc backing plate and used custom discs and '76 Eldorado calipers for rear disc brakes and retrofitted newer Jeep disc brakes for the front.
|
Bozi Tatarevic
> Party-vi
12/17/2013 at 10:28 |
|
Awesome. Love to hear other examples of ingenuity and re-using OEM parts
 quarterlifecrisis
> Party-vi
quarterlifecrisis
> Party-vi
12/17/2013 at 11:04 |
|
Good old GM parts bin brake kits. For GMT-400 trucks (chev/gmc from 88-98) you can do a rear disc conversion involving Caprice rotors and some random 80s Cadillac Seville parts if memory serves.
|
Bozi Tatarevic
> quarterlifecrisis
12/17/2013 at 11:09 |
|
It still applies. I am going to upgrade the brakes on the STS soon and will be using a mix of new Camaro and CTS-V Parts
|
quarterlifecrisis
> Bozi Tatarevic
12/17/2013 at 11:20 |
|
There's something good about that though. Being able to make mods to a car that are more than just "stock appearing," they really are factory parts, they work, and they make everything better.
 BiTurbo228 - Dr Frankenstein of Spitfires
> Bozi Tatarevic
BiTurbo228 - Dr Frankenstein of Spitfires
> Bozi Tatarevic
12/17/2013 at 11:38 |
|
That's excellent. I may have to borrow some of that if the GT6 brakes on my Spitfire aren't quite up to the job.
The only thing I'm considering is the weight of the brakes. OEM spec Brembos seem to be a good bit heavier than Wilwoods or Hispecs, although you can't beat salvaged OEM if you're on a budget.
|
Bozi Tatarevic
> BiTurbo228 - Dr Frankenstein of Spitfires
12/17/2013 at 12:06 |
|
There was about 3 lbs added per caliper and about 2 lbs per rotor in weight compared to the stock setup but the maintenance and reliability of OEM parts was a big factory as well as cost. The next cheapest option (Wilwood) that had equal performance was about $400 more
 TinFoil Knight
> Bozi Tatarevic
TinFoil Knight
> Bozi Tatarevic
12/18/2013 at 06:25 |
|
Okay so this should be a rinse and repeat step by step process for coming up with a T-5 transmission for my 2000 3.8V6 Mustang. In Theory. seems simple enough. here I go again
|
Bozi Tatarevic
> TinFoil Knight
12/18/2013 at 10:04 |
|
For transmission, local sources are usually the go to because of shipping but if the seller is willing to work with you shipping is not expensive either if palletized
 elvinrivera
> Bozi Tatarevic
elvinrivera
> Bozi Tatarevic
12/19/2013 at 09:28 |
|
I know it wasn't a popular car but I own a 2001 Cadillac Catera Sport. When I bought it I thought of it as a German engineered autobahn/alpine road sport sedan. You know, a poor man's BMW 5 series. That was before I learned of it's reputation as a lemon. That said, I love the car dispite its nagging and at times expensive problems. Immediately I went about upgrading her. Being built by Opel in Germany I learned that its single piston front brake calipers were replaceable by the 2004 GTO's dual piston calipers without any modifications other than using the longer GTO brake line. The GTO was a Holden which was developed from the Opel Omega. I added slotted discs all around and the stopping power in wet or dry is phenomenal.
Needing new suspension bushings and finding nothing other than GM OEM, I looked at the stuff available in Europe. I ordered front polyurethane bushings from Powerflex meant for the Opel Omega. The rears were available from Pedders USA and meant for the '04 GTO. Together they improved handling immensely.
Not many upgrades parts bin engine upgrades but if you need a new engine the 3.2 LA3 V6 long-block from the '02-'03 Cadillac CTS will fit. Just swap the oil pan and fuel/air parts from the original engine and it an exact fit. The extra 200cc make a noticeable difference.
The Catera may be a foreign orphan but parts bin upgrades are still possible.
|
Bozi Tatarevic
> elvinrivera
12/19/2013 at 09:39 |
|
The Catera gets a bad rap but the most common issues can be solved by doing some maintenance. Doing the timing belt job guarantees that the timing belt issues do not pop up and the rest is upgradeable and for the ultimate part bin upgrade: LS1 Catera
 TheTick247
> Bozi Tatarevic
TheTick247
> Bozi Tatarevic
12/19/2013 at 10:18 |
|
Definitely a potential benefit of buying a car that shares parts/platform with a "luxury" nameplate. First thing I did when I bought my 2010 Accord was to upgrade the rear swaybar to a thicker Acura TSX that is a direct replacement. MUCH less under-steer now and at a fraction of the price of similar aftermarket options.
|
TinFoil Knight
> Bozi Tatarevic
12/20/2013 at 07:06 |
|
That's what most people would think, and for the most part usually that is true. I don't know why exactly this time seems to be an exception unless its a vast conspiracy. Local dealership service department says that a rebuilt t5 installed by them is gonna run me $1900 new transmission is $2700. Either of those has about a snowball's chance in hell of happening.hell I only paid $1500 for the entire car. Local transmission shops and service centers that do repairs have quoted me from a low of $850 to a high of $1800 .yeah sorry I'm not that sucker. my local 24 hour Autozone says they have a t5 listed as available in inventory for $899 and change.Emilio(the homey who works nights there) says the computer is wrong cause its not in the store but he can order it and have it here in a couple days for $930. Moving on. I started on Salvages. I've got the inside line on a couple of em thanks to family. Wilson's Ford salvage quoted me $650 for a t5 from an 01 with 140k on it. no thanks what else ya got. 700 for one from an 05 with only 83k miles. So it goes from about 15 other salvages here in the metro area.I have yet to find a viable option for anything less than $400 from a salvage. Looks like I buy a $200 rebuild kit from online source and learn how to rebuild a transmission is gonna be what ends up happening.I'm okay with that, if I can just find the extra time to do it.
|
elvinrivera
> Bozi Tatarevic
01/03/2014 at 06:06 |
|
I agree. The Catera has great potential if you have deep pockets and automotive skills. The Omega V8 stock was bought by Lingenfelter with plans to build Catera V8s in the US but he died before production started. Only one example was built and, in my opinion, is the true ultimate Catera. It uses a C5R 7.0 liter (427cu.in.) V8 from a Corvette built to race at the Daytona 24 Hours with a Tremec T56 6 speed transmission. The remaining "kits" were sold to Catera owners. To my knowledge none have been completed but who knows? Links to the Lingenfelter Catera and one of the home-build projects follow:
http://www.pbase.com/elvin315/the_c…
http://www.cadillacforums.com/forums/cadilla…